Get PayPal Buttons & Added Tax for Your Sales Page
This tutorial will show you how to make buttons in PayPal as well as how to integrate them to your sales page. After that you will be able to get payments from clients (with added tax, if required for your country).
1. Open your PayPal
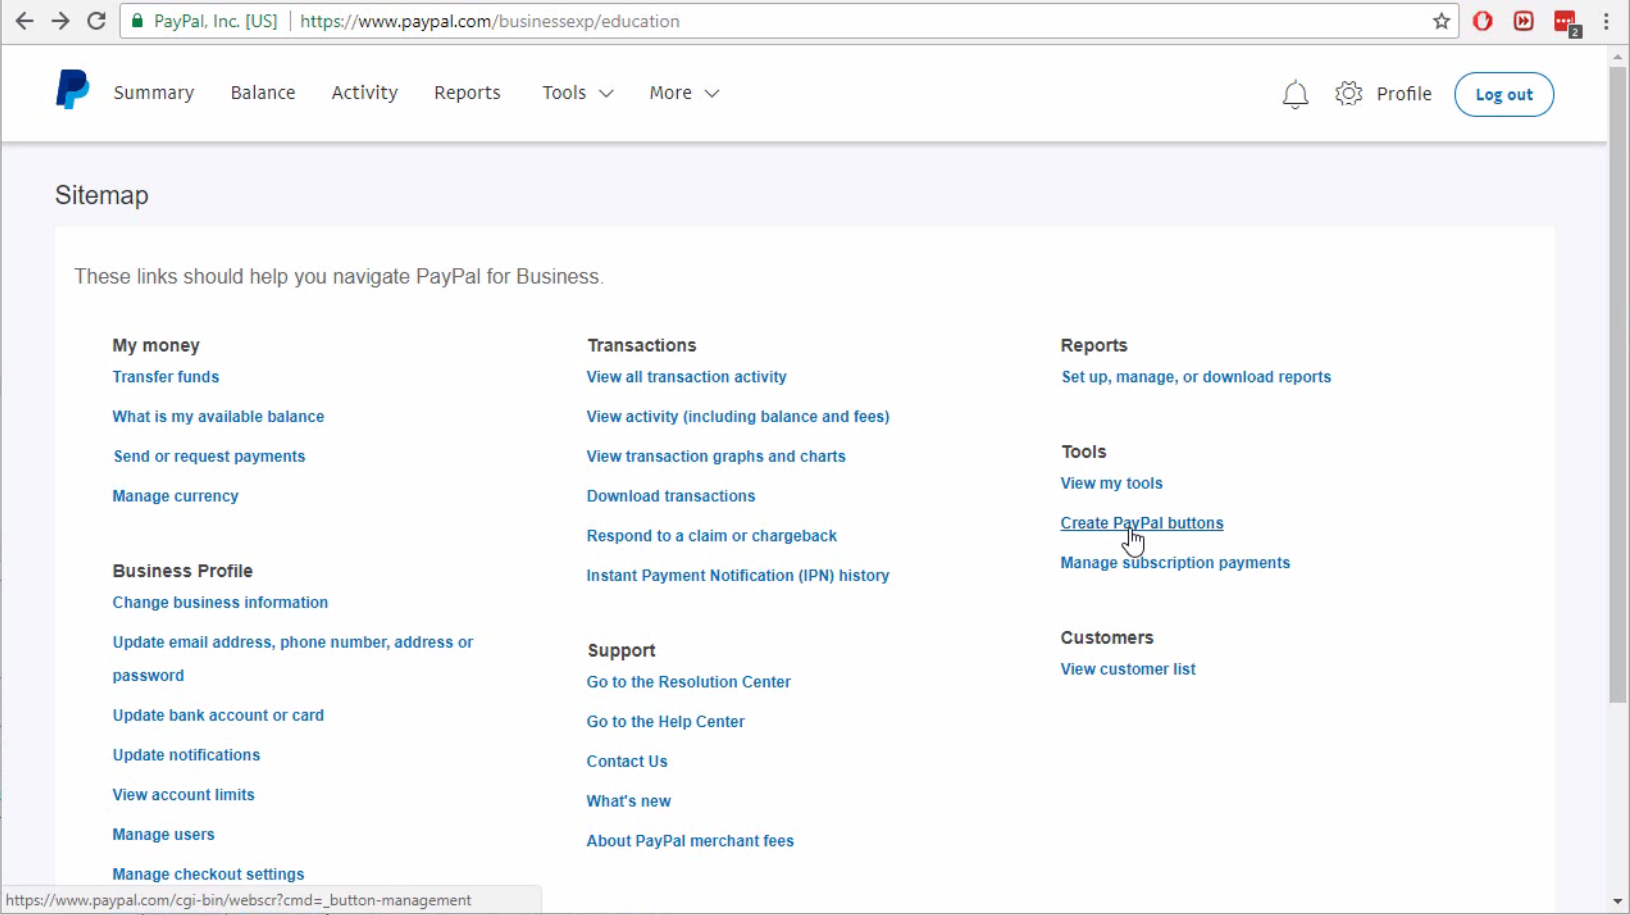
2. From the main menu go to Tools → Business
3. Click on Create PayPal Buttons
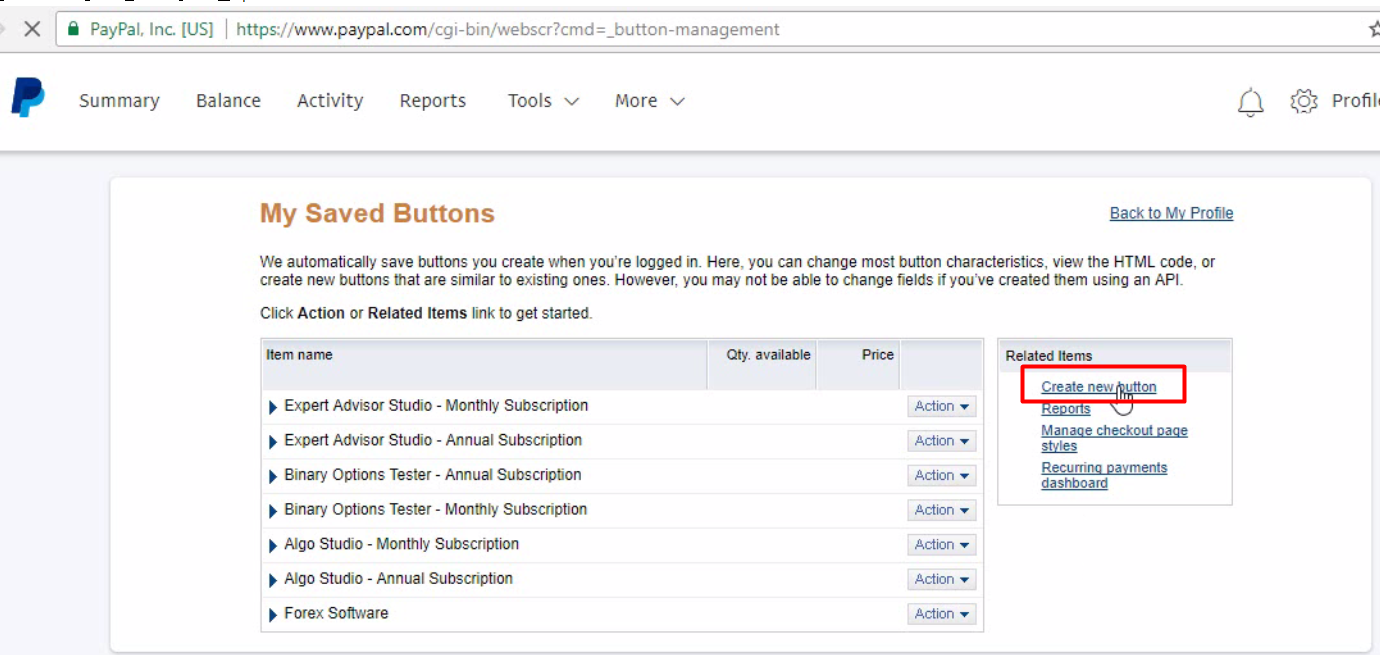
4. From the next page choose Create New Button
5. Creating the button
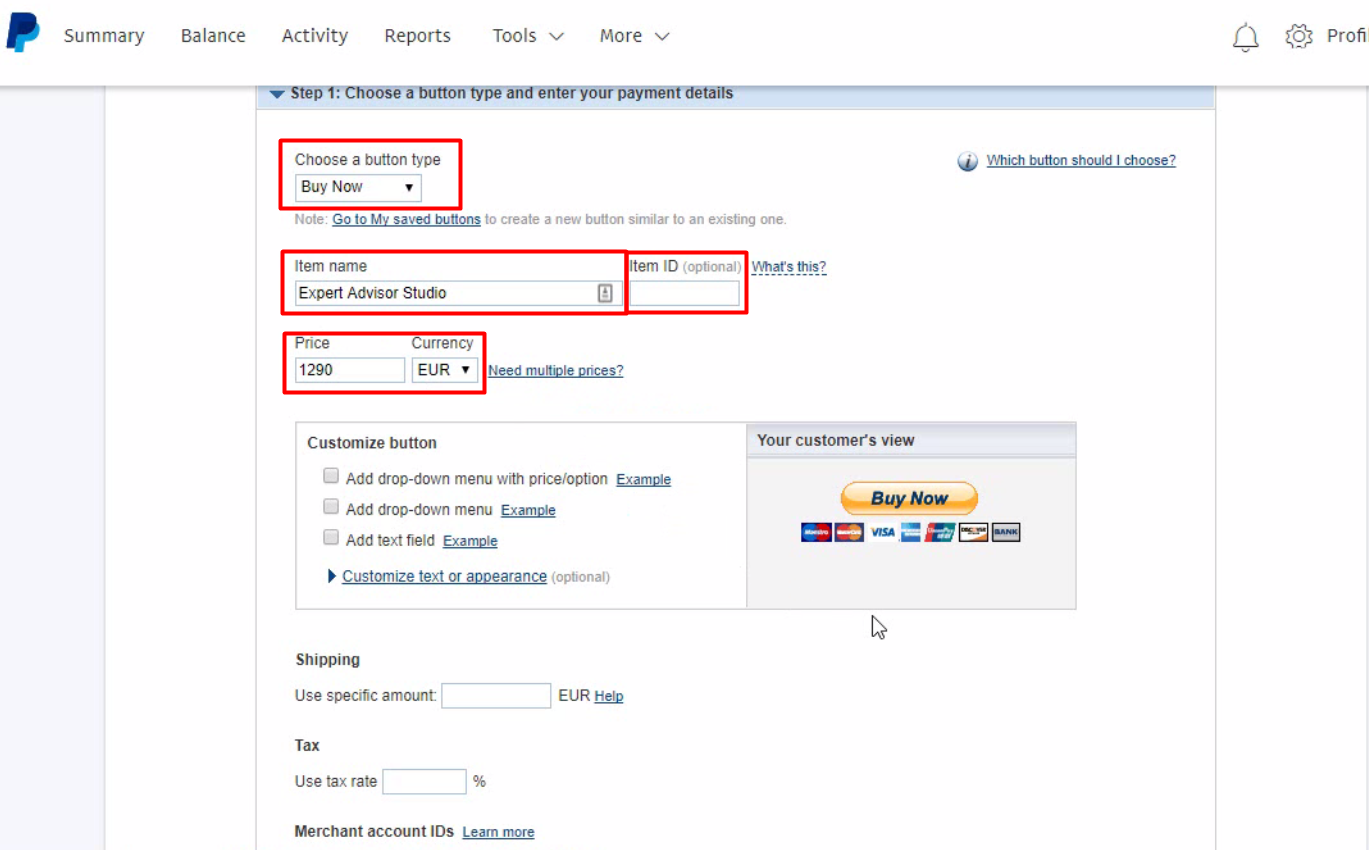
5.1 Step 1.
- Choose Buy Now
- Enter the name of the item:
Item Name: Expert Advisor Studio - Lifetime License and Item ID: eaStudioLifetimeLicense
Item Name: Expert Advisor Studio - One Year License and Item ID: eaStudioOneYear
- Price should be the price you want to sell at.
- Leave the default values in the other fields in Step 1
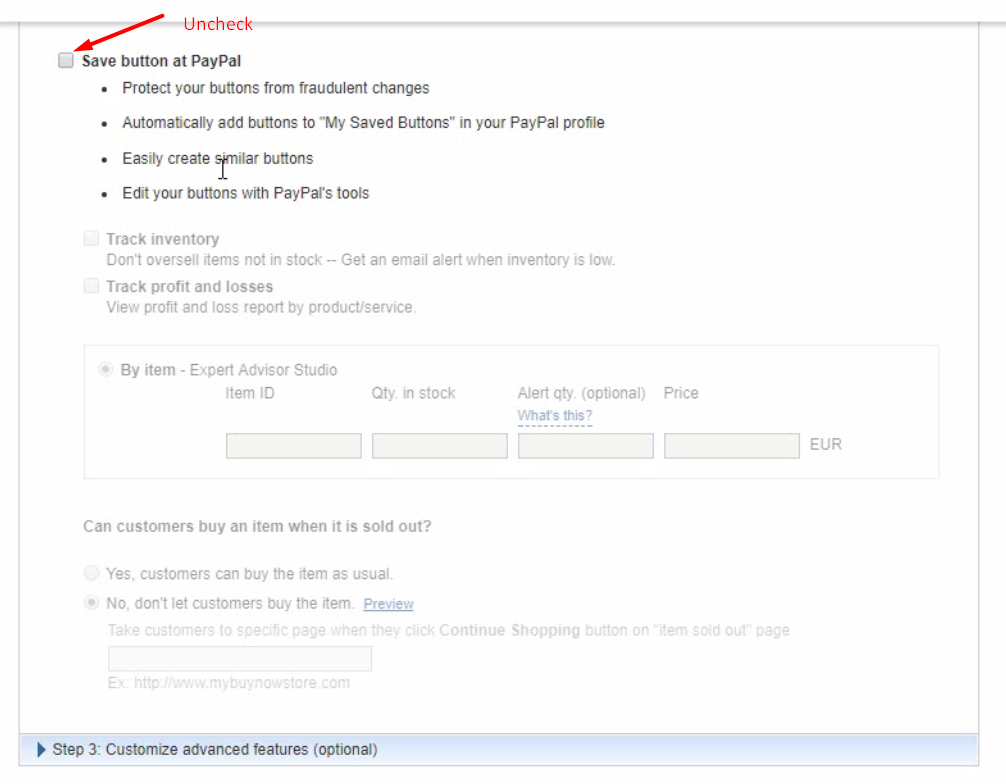
5.2 Step 2
At this step uncheck the Save button at PayPal. If you leave it checked the button won't be editable and we won't be able to add tax to it dynamically later.
5.3 Step 3
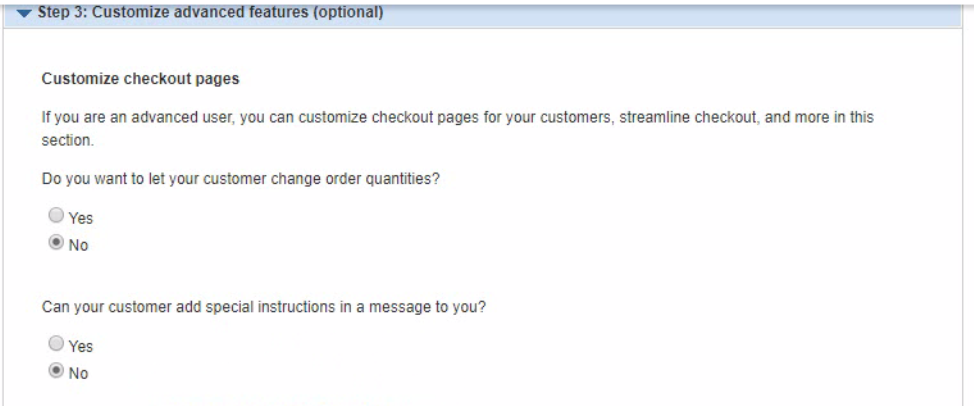
- Do you want to let the customer change order quantities? - Select No
- Can the customer add special instructions in a message to you? - Select No
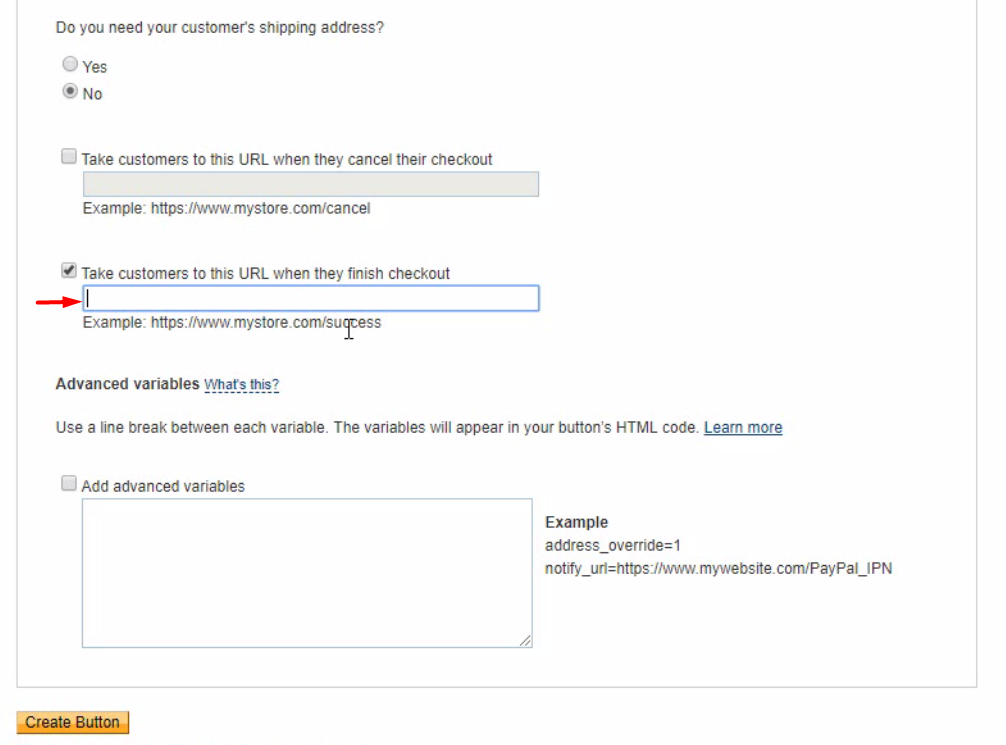
- Do you need the customers shipping address? - Select No
- Take customers to this URL when they cancel their checkout - You can leave it empty or you can fill in an URL for a page where you display a feedback form if you want to know why your customer cancelled.
- Take customers to this URL when they finish checkout - It is good to use this option and enter an address here. A great example for a Thank You page would have the following text: Thank you for your purchase! You should receive a license for EA Studio in the next 24 hours. If you do not receive a license within 24 hours please contact us at name@example.com
- Add advanced variables - Leave this unchecked and leave the textarea below empty.
5.4 Click on Create Button. This will take you to the next page.
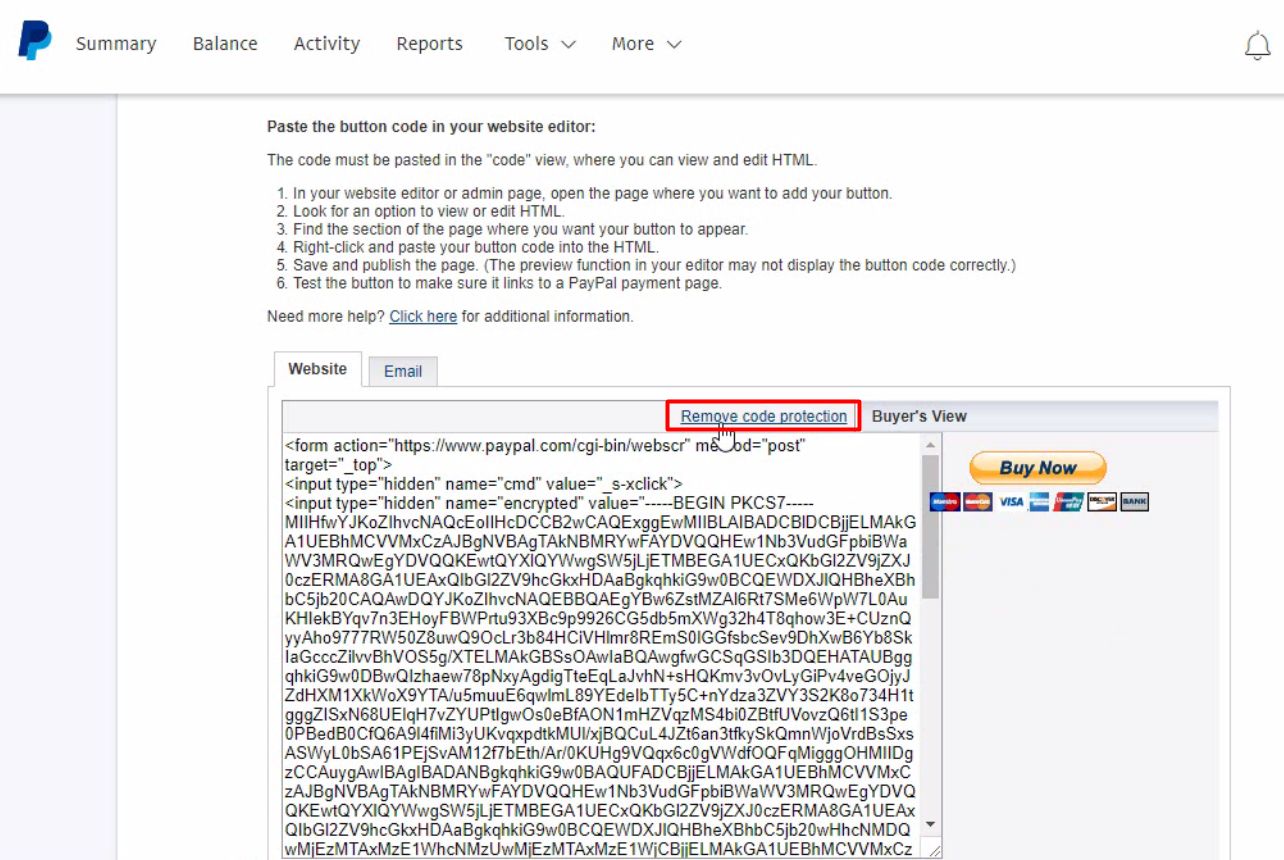
6. This page displays the button. However it is not usable in this form. We need to remove the PayPal protection from it so we can add tax later trough JavaScript.
Click “Remove Code Protection”.
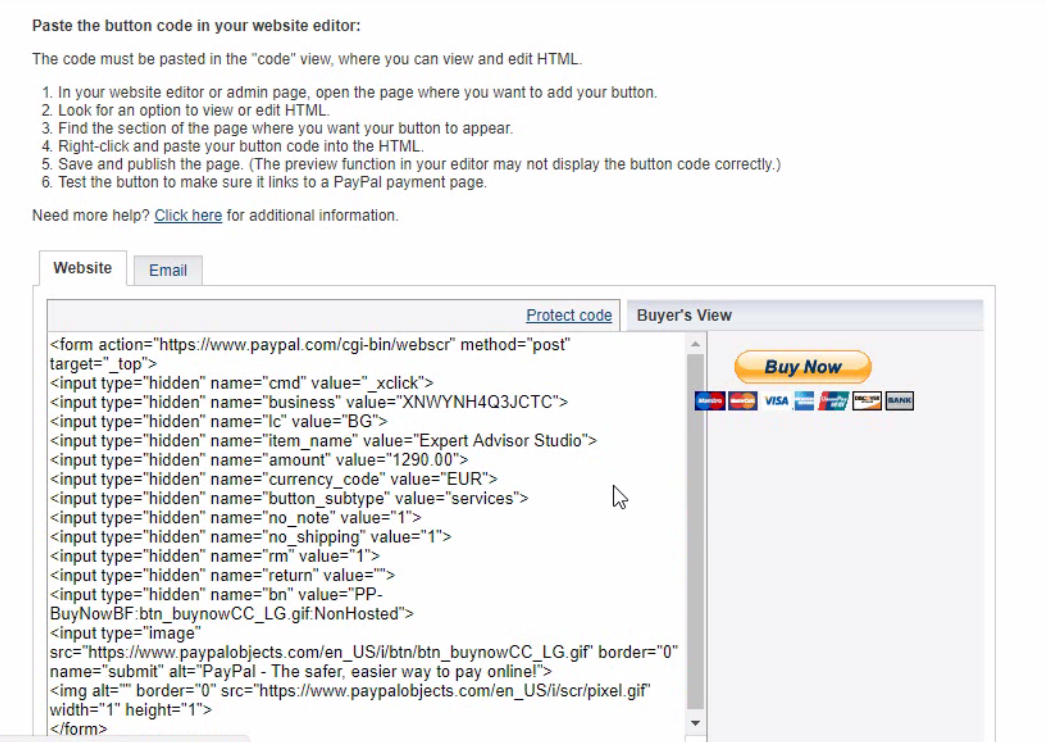
Now you will see the unencrypted button like so:
7. Copy the button script to a html or txt file. We will need it for the next steps.
8. Repeat the process for each button you need to create. You will probably need 2 buttons. One for a lifetime license and one for a one-year license.
9. To setup your sales page and add tax to the buttons please see the following example https://bitbucket.org/ya_vo/forexsb_example_purchase_page/src
I tried to document the code as well as I could. Please read the comments.
Also here is a short explanation how it works:
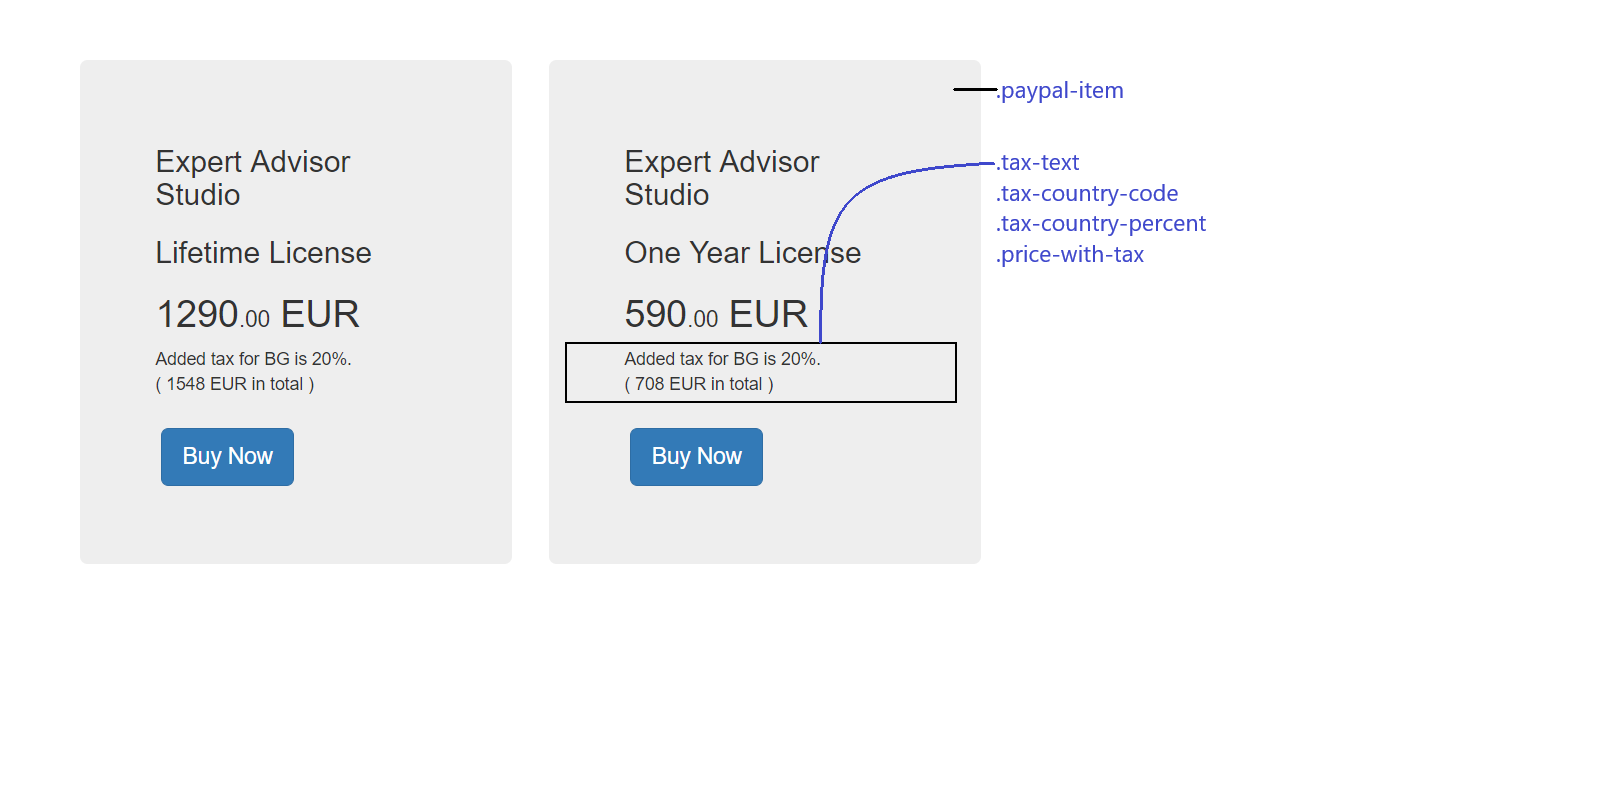
1. We add a container div for each item we're going to sell. The container div should have a class paypal-item 2. If we want to add tax for clients we add the span with class tax-text 3. The spans inside it serve as template “variables” where the JavaScript will place the values.
4. In the < form > there are several important fields you have to fill in with your data
- item_name (leave as in example)
- item_number (leave as in example)
- amount - change to your price - add class=“paypal-item-price”
- currency_code - change to your currency if needed
- tax_rate - leave it empty for the JavaScript script will handle it - add class=“paypal-tax-rate”
- business - this is very important. Change it to the one from your button or the money from your sales will come to our PayPal account and we want them to come to yours.
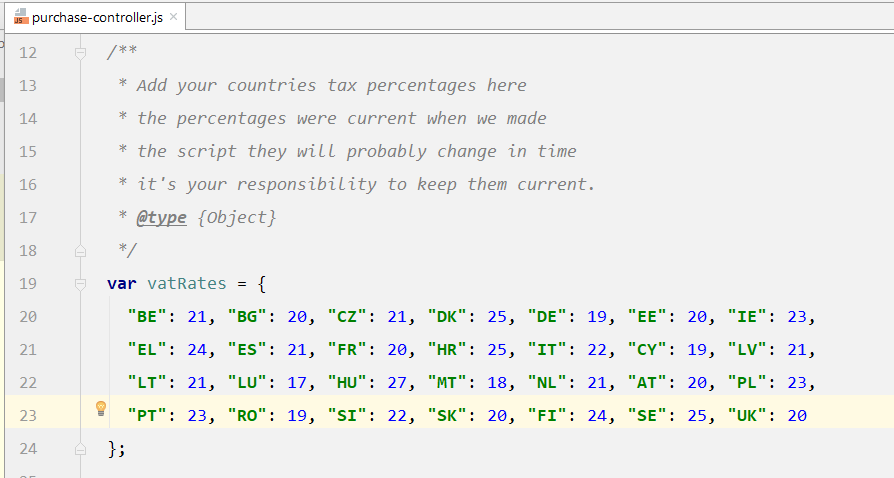
If you need to add tax for your country do add the country code (and remove countries you don't want to tax) from purchase-controller.js in the example like so
I tried to comment the code well too. Read the comments. If you find any problems with it or have any questions send me an email at yavor@forexsb.com I will answer and extend the tutorial.
