Table of Contents
Indicator Properties
1. Navigation and Choosing Indicators
Adding an Indicator
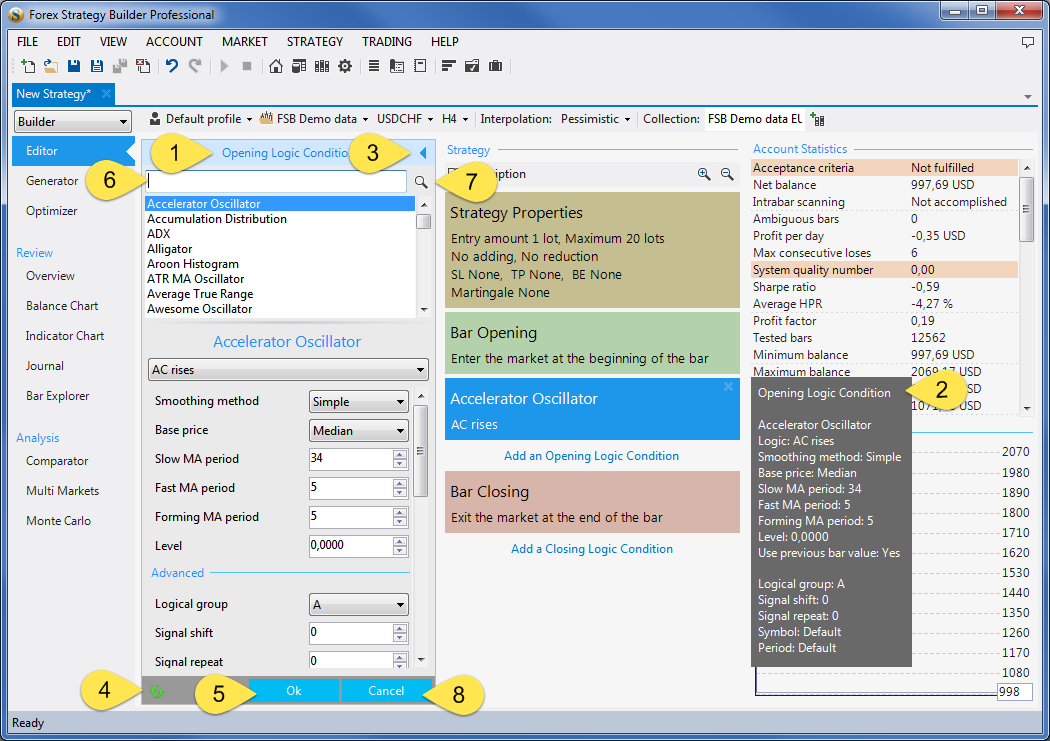
To add an indicator click on a slot from the middle column of the screen. In a new strategy you would have a Opening Position Slot with a Bar Opening indicator selected in it. Clicking on each slot will open the Indicator Properties. To add an indicator simply choose it from the list at the top.
Choosing an indicator
To choose an indicator you can use the simple search (6 on the picture). Then select the indicator with your mouse or press Enter. Choosing a different indicator will open its properties and populate the slot with it. Its values will be set to their defaults.
The list of indicators to choose from consists *only* of indicators that are suitable for the selected slot, so there is no risk that you add an unsuitable indicator in the wrong slot.
Operating the Indicator Properties Area
- OK (5) - This button will hide the Indicator Properties of the currently selected slot. The property options you have chosen will persist.
- Cancel (8) - This will cancel any changes to the options. If you have just added or chosen the indicator, clicking on the Cancel button will also cancel any changes. If you just added the slot, the slot will too disappear. If you were changing a previously existing slot - the slot will be reverted to it's original status.
- Close and apply button (3) - This button in the same way the OK button does.
- Reset all parameters to their default values (4) - If you have made any changes to the indicator parameter options, they will be reset to their defaults, as if you just selected that indicator from the list.
Knowing what type of slot is selected (1, 2)
From marks 1 and 2 on the picture above you can see the type of slot that your indicator is being placed in. The tool tip pointed by mark 2 appears when you keep your cursor for a while above a strategy slot.
Every indicator has at least one logical application (See mark 1 on the picture above). Most indicators have several options.
2. Example: Bollinger Bands
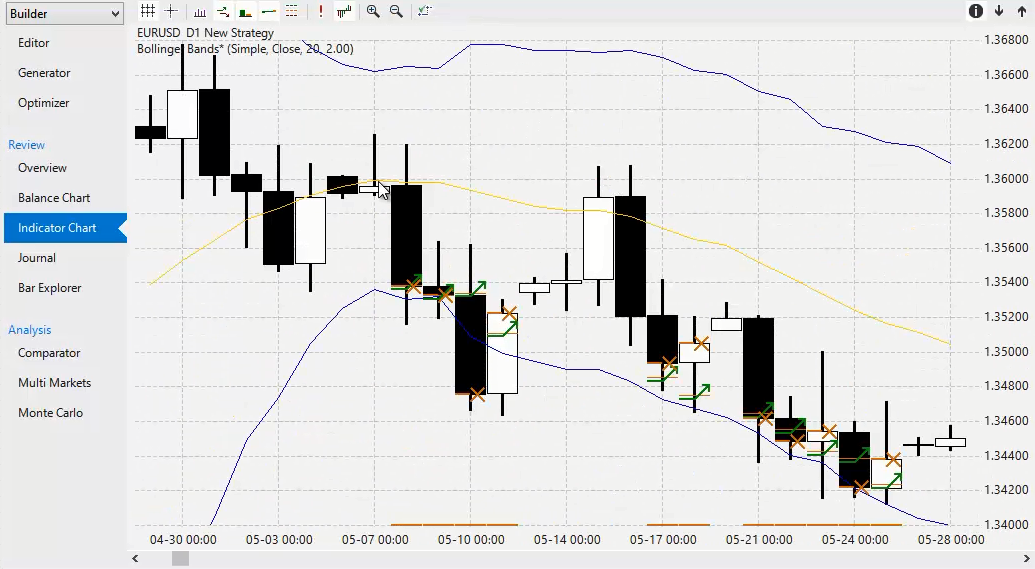
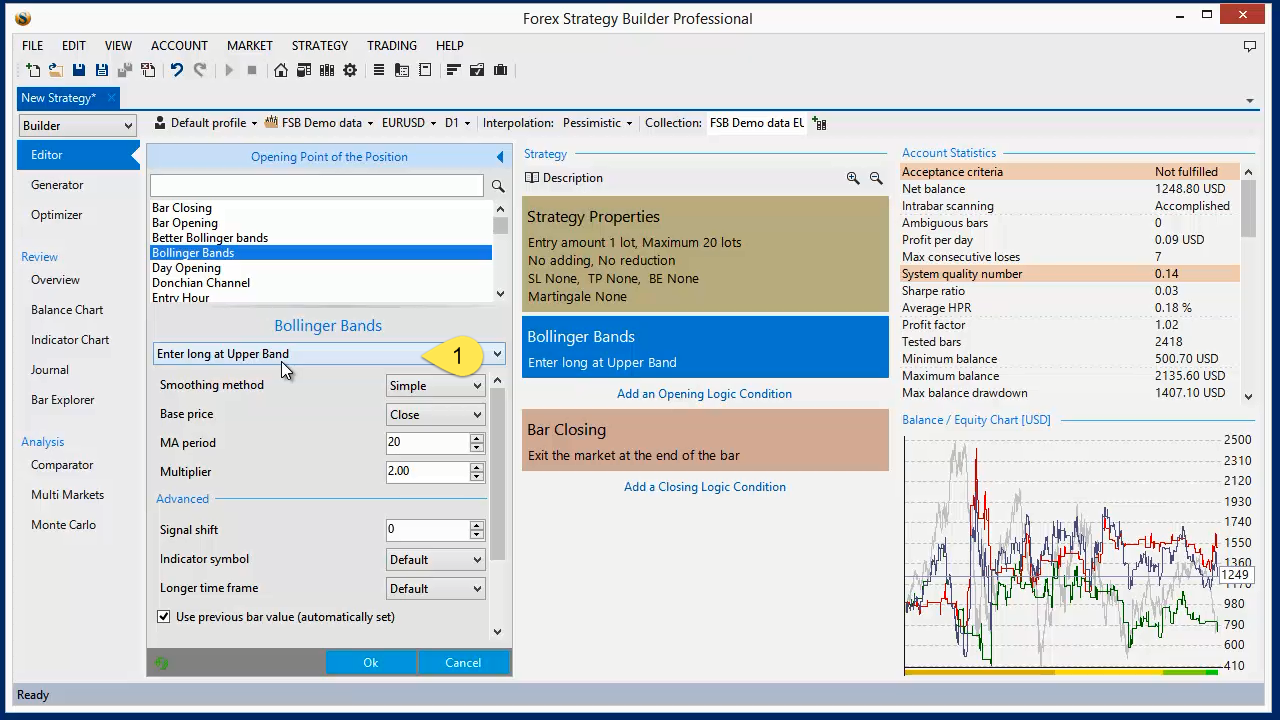 As you already know the Bollinger Bands indicator consists of a two lines that are “shifted” below and above the Moving Average. At mark 1 on the picture there are 2 options to select from. The first one is “Enter Long at Upper Band”, which means the program will open a long position at the upper line of Bollinger Bands indicator and a short position at the Lower Band.
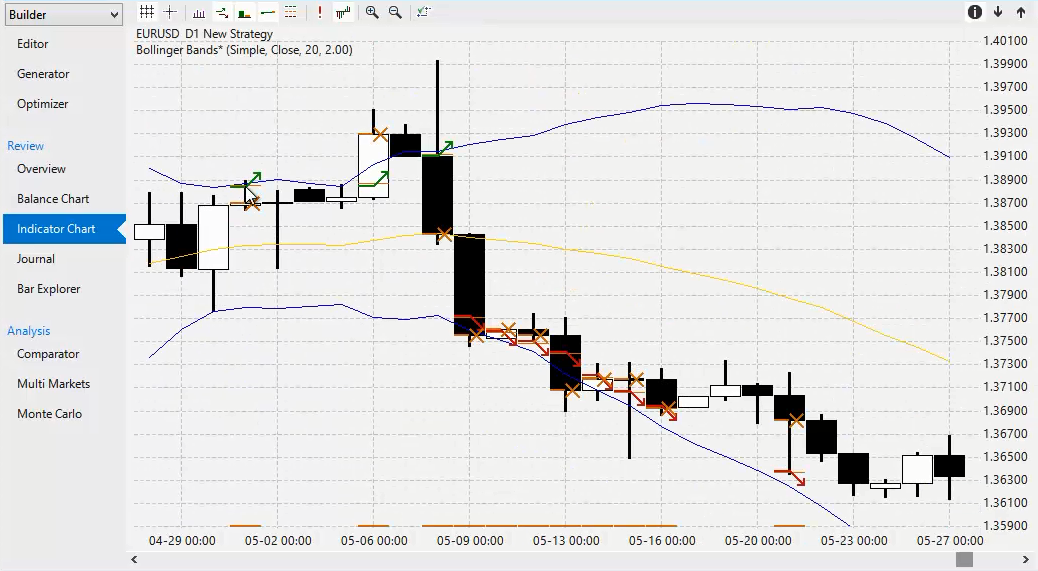
This behavior can be seen on the picture below:
If we choose “Enter Long at Lower Band” instead, the program will open a long position when the price reaches the Lower Band and short positions when it reaches the Upper Band. (See below)
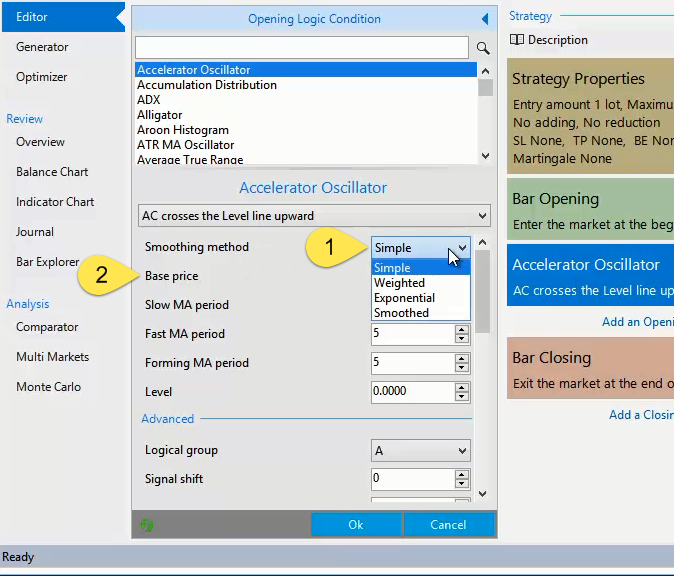 Most indicators have a variety of options to let you customize them.
- 1 - The “Smoothing Method” relates to the Moving Average and that method is used to make the line look smoother.
- 2 - Most indicators have some kind of a “Base Price” field. This parameter is very important. The Accelerator Oscillator indicator for example is, by default, calculated at Median price. The most used Base Prices are Open and Close (i.e. in the beginning of the bar and in it's end). An example of an exception is the Average True Range indicator where the base price is calculated based on a bar range and can not be changed.
- When changing a value in a numeric field you can use your mouse scroll.
- Putting your cursor over a parameter will let you
- Numeric fields won't allow you to enter number outside the parameter's possible values.
3. Indicator Logic and Optional Fields
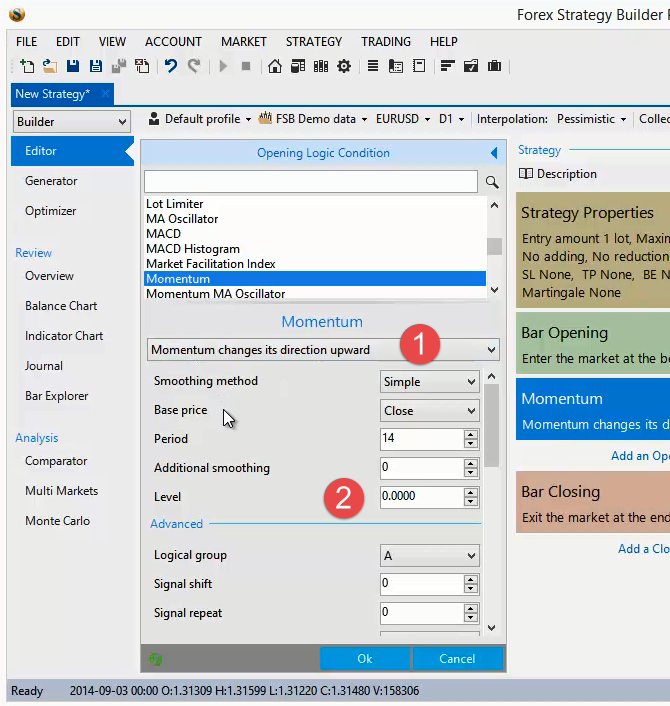
Some indicators have parameters that are taken into account only when the selected logic requires them. For example let us take the Momentum indicator. It has the following application logic options:
- Momentum raises
- Momentum falls
- Momentum is higher than the Level line
- Momentum is lower than the Level line
- Momentum crosses the Level line upward
- Momentum crosses the Level line downward
- Momentum changes its direction upward
- Momentum changes its direction downward
However the Level parameter from the indicator properties will only work if we select logic that refers to the Level.
The picture above shows a case, where “Momentum changes its direction upward” is selected, so the Level parameter will not be used. You can enter any value and the line will not change.
~~DISQUS~~
